Hardware and
software requirements (SharePoint Server 2010)
1. Configuring the server – Configuration
operations for SharePoint 2010
We need to
do some configuration before installing SharePoint 2010. Here I have explained
the configuration one by one.
i. Adding Server Roles and Roles Services – Application Server – Web Server
On the
Initial configuration task windows, click "Add Roles"
The
"Add Roles" Wizard is opening.
Check the
check box for Application Server.
The wizard
opens a modal dialog for the Required Features.

Just click the "Add Required
Features" button.
You are taken to and intermediate
dialog. Click "Next" to go to the "Role Services" dialogs.
Click "Next"
On the "Role Services" dialog, select the followings:
.Net Framework 3.5.1
Web Server (IIS) Support
TCP Port Sharing
HTTP Activation
TCP Activation
Named Pipes Activation

Then Click "Next"
You are taken to an the intermediate
page for the Web Server (IIS) Role

Click "Next"
The Select Role Services for Web
Server (IIS) Role is displaying, but just let the default options.

Click "Next" to access the
confirmation dialog


ii. Adding Desktop Experience Feature
It would be
interesting for a development machine to be able to use the Windows Photo
Viewer in order to check some screenshots taken during configuration phases, or
when wanting to report an issue. To be able to use this feature of Windows
server 2008 R2 you have to activate the Desktop Experience feature.
Go back to
the “Initial Configuration tasks" window and click "Add
feature", then locate "Desktop Experience" check box and check
it.

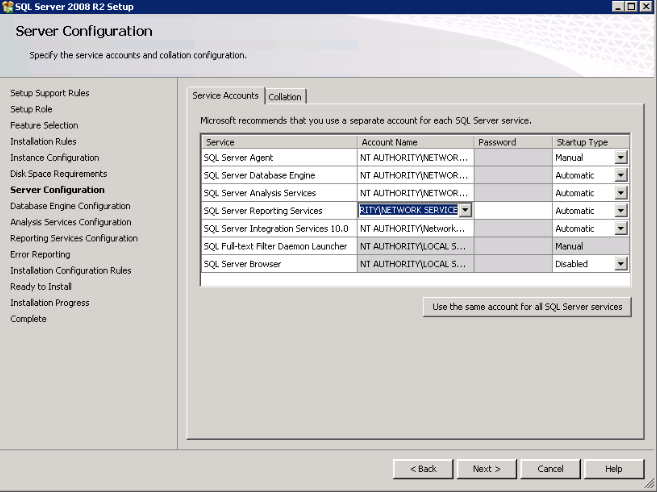
2. Installing SQL Server 2008 R2
Follow
normal procedure to install SQL Server. Below I have given some of the snap
shots for reference


Note: If you are going with SQL Server 2008, then follow the installation steps and hot fix from the below link
3. Microsoft SharePoint Server 2010
Installation
i. Double
click the installation package (default or splash) to lunch the installation of
Microsoft SharePoint Server 2010.

ii. Click
the "Install Software Prerequisites" in order to update, complete and
check the previous preparation described in the previous sections of this post.
The Microsoft SharePoint Product and technologies 2010 Preparation Tool is
opening

Note: You need internet connection
to download and install
Next àaccept the license agreement àthen you get following screen

iii. Back to
SharePoint 2010 Installation wizard; click the “Install
SharePoint Server” link.
Enter the
product key and continue…

Then, choose
your preferred type of Microsoft SharePoint Server 2010 installation – here I
go with Server Farm Installation
Get the
SharePoint 2010 Standalone vs Farm Installation from

Select the
type of installation you want to install on the server. Here I go with
“Complete”

Click
“Install Now” to start installation

When the
installation of the SharePoint files is finished you are asked to continue with
the SharePoint Products Configuration Wizard. Uncheck the check box and click
“Close” to close the wizard

Do not
continue with the Wizard, otherwise you will have an issue due to
the current installation described in this post. In the SharePoint 2010
version, you are not allowed as before to mount a Farm installation on a single
machine using local accounts. If you had continued with the wizard you would
have been stopped in the configuration by the following issue:
the specified user Administrator is a local account. Local accounts should only be used in stand alone mode.

Fortunately
there is a workaround to succeed in obtaining a Farm environment using
local accounts as we used to have in the previous version that I have found in
this post:
Note: I didn’t visit this link
Let us
create the service accounts we need for this.
iv. Creating
several service accounts – about lease privilege administration policy
In the post
concerning the Installation of the SharePoint 2010, I used a single local
account that was local administrator of the machine, but for this installation,
I have chosen to use 3 local accounts in order to be compliant with the least privilege
administration policy.
This policy
requires service accounts not to be administrator of any server of a farm, and
that each service or process runs using a distinct account.
I advise to
do it not only for the QA or production environment but also for development
environment, and this for two reasons:
1. First, doing this will help you to debug because
the traces of errors in the SharePoint log or in the event viewer sometimes
report the name of the involved account and it will be easier to debug an issue
if you have precise information and not always a reference to the unique
"Administrator" local account.
2. Second, using the same system of accounts within
the development machines and the QA and production ones can help you to prevent
some bugs. Some bugs are due to the fact that the security used for service
accounts are different on the development environment and the QA and production
ones. So it is better if a bug linked to this security configuration occurs in
your development machines than in the QA or worse in the production environment.
For these
two reasons, thus, I personally think it is a good practice to have the same
service accounts configuration in all your environments even on the development
ones.
Regarding
the least privilege administration policy, the minimal SharePoint installation
requires us to create 2 more local accounts (we already have
"administrator" account for installation):
1.
One is for the process of the IIS Application
Pool of the central administration. Assume we call it SPS_Farm
2. The
second will be used for the process of the IIS Application Pool of the first
Web Application if it is isolated in its own Application Pool. Assume we call
the first Web Application WebApp-80 because it will use the 80 port; let us
call this account SPS_WebApp.
So let us
create these two accounts and configuring them in order password never expires.


v. Create
the SharePoint 2010 Configuration databases using SharePoint 2010 Management
Shell
Open the
Management Shell

Type
following command
New-SPConfigurationDatabase
Then,
Database
name à
choose any name, I used SharePoint_Config
Database
server name àenter
Database Server name, mine
You will be
then prompt for the system account credential. It is now the time to pass the
credential of the SPS_FARM service account. Don't forget the machine (domain)
name otherwise you will get an exception of the SharePoint shell.

Then you are
asked for a passphrase. You can use Pass@word1 that matches the security
policies required. (This passphrase will be asked when you will add a new
server to the SharePoint Farm)

At this step
of the installation you can check that two operations has been performed behind
the scene.
Two
databases have been created in the database server referenced in the shell window.
3 web
services have been created in IIS with 3 distinct application pools for each.
That is a new feature of SharePoint 2010.
For more
information about installing SharePoint 2010 in a production environement while
being compliant with the least privilege administration policy, read this
excellent post (especially the comments discussing and explaining the
workaround about the "SPS_Farm" Database Access Account).
Here are the
official Microsoft documentation links on the topic:
- Installation and Deployment for SharePoint Server 2010
- Account permissions and security settings (SharePoint Server 2010)
- Administrative and service accounts required for initial deployment (SharePoint Server 2010)
- Manage service applications (SharePoint Server 2010)
vi. Running
the SharePoint Product Configuration Wizard

Let the
option "Do not disconnect from this server farm" checked.

Then you
will be prompted to choose the Central Administration Site port number. I
personally always use 12345 for the configuration of all my development environments
in order to type the same URL on all server.
Let the
default NTLM value for the "Authentication provider", Kerberos
requires network configuration we cannot perform in the current environment
anyway.

Configuration
Summary

Click Next
to run the configuration wizard, which performs 9 configuration operations

Finally, the
Configuration Wizard shows “configuration Successful” and once again summarizes
the configuration

Click
Finish, to close the wizard and open Central Administration, while opening CA
you’re prompted to credential, enter local system administrator account.

Then you are
asked to sign up to User Experience Improvement Program

Another page
let you choose between configuring your farm yourself or by using a wizard

When this
choice is made, you display for the first time the brand new Welcome Page of
SharePoint 2010 Central Administration

As there is
sometimes concern with the SharePoint Services installation with Windows 2008
Server R2, you should check that the services installation has completed
successfully.
On
SharePoint 2010 Central Administration Home Page under the System Settings
section click Manage services on server.

You should
see this screen that confirms that SharePoint Services installation has
completed successfully.

vii.
Creating a managed local account for SharePoint 2010
Now we have
to perform operations in order the previously created local account SPS_WebApp
be referenced as a managed account by SharePoint 2010.
So reopen
the SharePoint 2010 shell windows and type the following:
$myWebAppServiceAccount
= Get-Credential VMDEV-012\SPS_WebApp-80
You will be
prompt for this account credentials:

Then, type
the following
New-SPManagedAccount
-Credential $myWebAppServiceAccount
The
SharePoint 2010 Management Shell warns you that the managed account should be used
in standalone environment since it is a local account.

viii.
Creating 80 port for SharePoint 2010
SharePoint
2010 Central Administration --> Manage Web Applications -->
New

I have
personally chosen to create it on the default IIS web site, and as a personal
usage named it
"Web
App - 80"
Let the
Application pool default settings, named the content database
"WSS_Content_WebAppp_80"

You notice
then that you have the previously service account available as a SharePoint
2010 managed account to be the account under which the process of the new
Application Pool will run (Select SPS_WebApp account)
Click ok to
create web application with port number 80

Finally the
SharePoint 2010 Web Application is created.

Click "OK" to close the wizard and to be taken back to the Web Application Management Page where you can see the new SharePoint 2010 Web Application

Now, if we
go to check what have been done behind the scene in ISS we will notice that we
can retrieve a trace for our SharePoint 2010 managed local accounts:

Last, if now you use the SPS_FARM SharePoint 2010 managed local account to sign in to the Central Administration:

You will
notice that you are not connected as SPS_Farm, but as System Account

This account
is a Farm administrator account used ONLY to administrate the Farm using the
Central Administration Web site. As it is not a local administrator of the
server it cannot be used to run the SharePoint 2010 Configuration wizard, either
the obsolete stsadm or psconfig tools, nor the SharePoint 2010 management
shell. And there are operations that are no more available from the central
administration web site when you are logged in with this account, as
"Manage Services on Server".

ix. Create
Site Collection on 80 port (Web Application)
SharePoint
2010 Central Administration --> Create
Site Collection

Redirect to Create
Site Collection page, where I have personally chosen to create a team site
called "SharePoint 2010" Team Site"


Then
prompted on that the site was created successfully.

When
clicking on this site link, you can display your first SharePoint 2010 site.

Done
No comments:
Post a Comment